


Cooking a Turkey in the Oven
Juicy, flavorful, and beautifully golden—no smoker required. Follow this step-by-step guide featuring our Lane’s Turkey Brine Kit and Turkey Time Seasoning for a foolproof holiday centerpiece.
Step 1: Thaw Your Turkey the Right Way
Most birds come frozen—totally fine. The key is how you thaw it.
- Do not thaw on the counter. Always thaw in the refrigerator.
- Timing: A 12–14 lb turkey needs about 3 days in the fridge.
- Set the wrapped bird in a pan or bin to catch drips.
Time-saver tip: When the turkey is mostly thawed, you can finish the last 24 hours in the brine—the cold brine helps it along while adding flavor.
Step 2: Brine for Maximum Juiciness (24 Hours)
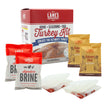
Brining a turkey before roasting locks in moisture and seasons the bird from the inside out. Our Lane’s Turkey Brine Kit includes the brine mix, a heavy-duty gusseted brine bag, and our Turkey Time seasoning so you’re set.
What You’ll Need
- 1 Lane’s Turkey Brine Kit
- 1 gallon cold water per cup of brine (our single-use kit uses 1 gallon)
- Food-safe container/tub to help the bag stand
Directions
- Place the brine bag in a container. Add 1 gallon cold water.
- Pour in the entire brine packet. Stir—no heating required.
- Submerge the turkey breast-side down, letting the cavity fill with brine.
- Seal the double zippers tightly and refrigerate for 24 hours.
Optional: See our full brine instructions here.
Step 3: Air-Dry for Crispy Skin (24 Hours)
- Lift the turkey out of the brine legs down to drain excess liquid.
- Do not rinse. Our all-natural brine ingredients can stay on the skin—extra flavor!
- Pat dry thoroughly (inside and out) with paper towels.
- Set the turkey on a tray and refrigerate uncovered for 24 hours.
Step 4: Make Turkey Time Compound Butter
You’ll Need
- 4 sticks unsalted butter (softened)
- Lane’s Turkey Time Seasoning (to taste)
Directions
- Mix butter with Turkey Time until you can see seasoning throughout.
- Reserve about one stick’s worth in a separate clean container for basting later.
Step 5: Season & Prep for the Oven
- Gently loosen the skin over both breasts with your fingers.
- Massage the compound butter under the skin on each side.
- Lightly spray the outside with a high-heat spray (we love Duck Fat Spray) to help seasoning stick.
- Season generously with Turkey Time Seasoning —start on the underside, then the top so it looks perfect in the rack.
- Ultimate Turkey Brine Kit (Spellbound + SPG): Season with a light layer of SPG, then a layer of Spellbound.
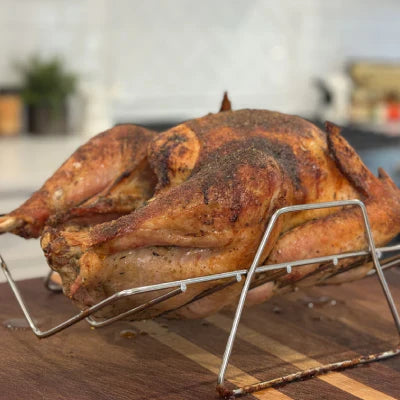
Step 6: Roast to Perfection
- Preheat the oven to 325°F. Place the turkey breast-side up on a rack in a roasting pan.
- Roast at 325°F until the internal temp reaches about 140°F (roughly 2 hours for a mid-size bird).
- Melt reserved compound butter and baste every 15–30 minutes as it finishes.
- When the internal temp hits ~150°F, increase oven to 375°F for the last 20 minutes to deepen color and crisp the skin.
- Cook until the thickest part of the breast reads 165°F (thigh about 175°F). Then remove from the oven.
- Rest 20–30 minutes before carving.
Cook to temperature, not time—use a reliable instant-read thermometer.
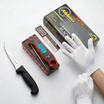
Step 7: Rest, Carve & Serve
After resting, separate breasts, thighs, and drumsticks with a sharp knife and slice across the grain. Serve with extra warm compound butter on top if you’re feeling fancy.
Want a visual? See our turkey carving walk-through guide & video.
Pro Tips from Lane’s BBQ
- Plan ahead: Thaw 3 days (12–14 lb), brine 24 hours, air-dry 24 hours.
- Don’t rinse post-brine: Keep that flavor on the skin.
- Air-drying = crispy skin: The fridge airflow does the magic.
- Butter under the skin: Adds richness and helps browning.
- Rest before carving: Keeps slices juicy.

Leave a comment
All comments are moderated before being published.
This site is protected by hCaptcha and the hCaptcha Privacy Policy and Terms of Service apply.