


Ready to become the Hibachi master of your backyard? Grab your apron and fire up the griddle, because this step-by-step guide & video from our buddy Benton Palmer of @grillthissmokethat will teach you how to make the juiciest Hibachi steak, chicken, and shrimp you've ever tasted—right at home. Let’s get cookin’!
Hibachi Ingredients You’ll Need
Before you start tossing veggies and proteins onto the griddle, gather your ingredients. You’ll need:
Proteins:
- Chicken breast
- New York strip steaks
- Shrimp (red shrimp preferred, but any fresh shrimp will do)
Veggies:
- Zucchini
- Carrots
- Onions
Rice:
- Day-old rice (This helps it fry up beautifully and not get soggy)
Seasonings & Sauces:
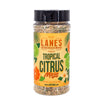
- Lane’s Q-Nami (this one’s a game-changer, trust us)
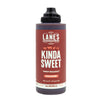
- Lane’s Pow Pow (adds that perfect kick at the end)
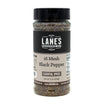
- Lane's SPG (Salt, Pepper, Garlic—simple but effective)
- Kikoman soy sauce
- Sesame oil
- Cornhusker Kitchen Wagyu Beef Tallow (for that rich, savory flavor)
And don’t forget the butter and fresh minced garlic for that mouthwatering finishing touch!
Step 1: Prep Your Rice and Veggies
Hibachi is all about prep. The night before, cook your rice and store it in the fridge. The slight drying out helps it fry perfectly when it hits the griddle.
While the rice is chilling, chop up your zucchini, carrots, and onions. You’ll want them to cook evenly, so cut them to a similar size.
Step 2: Fire Up Your Griddle
Get your griddle nice and hot. Drizzle a bit of oil over it and toss in some freshly minced garlic. The aroma? Pure magic. Now, add your day-old rice. Don’t forget to season it with SPG (salt, pepper, garlic) for that classic Hibachi flavor. Stir it around, breaking up clumps and letting it get a nice fry.
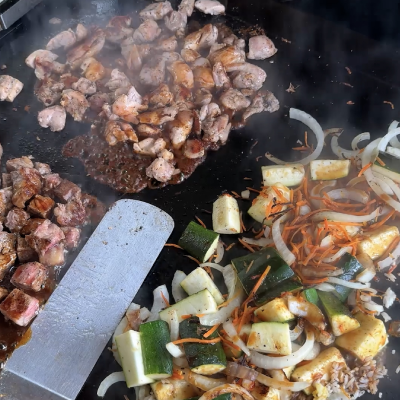
Step 3: Veggies on the Griddle
On the other side of the griddle, toss in your zucchini, onions, and carrots. Give them a good spray of CornHucker Kitchen Wagu Beef Tallow. Trust us, this step is essential. Then, sprinkle a generous amount of Lane’s Q-Nami seasoning over everything. Mix it all up and let it cook. Don’t forget to stir every so often to ensure all sides get that lovely griddle crust.
Step 4: Sear the Steak
Now it’s time to work on that steak! Lay down your seasoned New York strip steaks (with more Lane’s Q-nami) on the griddle. Let them sear and get that golden brown crust. After about 3-4 minutes, flip them to ensure an even cook.
Step 5: Add the Chicken
While your veggies and steak are doing their thing, get the chicken on the griddle. Spray some Wagyu beef tallow and drop the chicken onto it. Sprinkle with Lane’s Q-Nami seasoning for that savory punch. Keep an eye on it and flip after a few minutes.
Step 6: Stir the Rice
Every few minutes, stir your rice to make sure it’s getting that perfect fried texture. Mix it up so it’s crispy and flavorful on all sides.
Step 7: Eggs in the Rice
Once the rice is golden and sizzling, make a little well in the middle. Crack 3 eggs into the well and scramble them right on the griddle. Once scrambled, stir them into the rice for that classic Hibachi-style fried rice you know and love.
Step 8: Add the Soy Sauce & Sesame Oil
Now, take your Kikoman soy sauce and drizzle it over the rice. This gives it that deep, umami flavor that makes Hibachi rice so irresistible. Add a little sesame oil, too, for a nutty finish.
Step 9: Time to Finish the Meat
At this point, the steak and chicken should be close to done. Remove them from the griddle and slice them into bite-sized pieces. Toss the steak back onto the griddle to give it a little more sear.
Step 10: Shrimp Time
Now, let’s talk shrimp! Drop some butter and fresh minced garlic onto the griddle. When the garlic starts to get fragrant, toss in your shrimp (tail-on works best). These little guys cook quick, so give them just a couple of minutes on each side. When they start turning a lovely reddish-pink, they’re ready to go.
Step 11: Final Touches
As the shrimp finishes up, season them with a little Lane’s Pow Pow sauce. This brings it all together with a touch of sweet heat that’s perfect for Hibachi-style dishes. You don’t want to add it till right at the end when the chicken and steak are almost done because the sauce is going to give it a nice caramelization quickly.
Step 12: Plate It All Up & Serve It Up!
Once everything’s cooked to perfection, use a large scoop to get all the goodness off the griddle and onto your plate. You’ve got your steak, chicken, shrimp, veggies, and rice—now go ahead, take a bite and marvel at your Hibachi mastery.
Plate it like a hibachi pro (or use a bowl):
- A scoop of rice
- A generous portion of veggies
- Steak, chicken, shrimp in all their glory
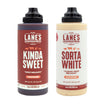
- Drizzle that yum yum, sriracha sauce, or Lane’s Sorta White sauce with no shame
- Add some chopsticks or a fork (no judgement here…), and you’re good to go!
Pro Tips for a Perfect Hibachi Experience
- Use fresh, high-quality ingredients. Your proteins, especially shrimp, can make or break the dish.
- Don’t rush. Hibachi is all about balance. Let each item cook at its own pace and make sure it’s getting a nice sear.
- Be generous with seasoning. Hibachi is all about bold flavors, so don’t hold back on the SPG and Lane’s seasonings.
Conclusion: Hibachi Heaven at Home
That’s it! You’ve just created a Hibachi feast worthy of a restaurant, all in your own kitchen (or backyard). With these simple steps and a little practice, you’ll be able to serve up steak, chicken, shrimp, and veggies that will impress everyone at the table.
So, grab your griddle, get cookin’, and share the love of Hibachi with family and friends. Don’t forget to drop any questions or tips in the comments—we love hearing from you! And as always, you can find all the products we used today on the Lane’s BBQ website.
Hibachi on A Griddle FAQ's:
What’s the secret to perfect Hibachi fried rice?
The secret to perfect Hibachi fried rice is using day-old rice! Fresh rice tends to be too soft and sticky for that crispy texture you want. Letting it cool in the fridge overnight helps it dry out, making it easier to fry up into that golden, crunchy perfection. Also, be sure to use high-quality seasonings like Lane's Q-Nami and a touch of sesame oil for authentic flavor.
How do you cook steak on a griddle like a Hibachi pro?
To cook steak on the griddle like a Hibachi pro, start by seasoning it with a bold seasoning like Lane’s Q-Nami. Then, make sure your griddle is hot before adding the steak to get a perfect sear. Cook the steak for about 3–4 minutes on each side, depending on thickness, for a juicy medium-rare. Let it rest for a couple of minutes before slicing into bite-sized pieces.
What vegetables are best for Hibachi-style cooking on the griddle?
For Hibachi-style cooking, go with zucchini, onions, and carrots. These veggies hold up well on the griddle and get a nice char without losing their texture. Don’t forget to season them with Lane’s Q-Nami and a little Wagyu beef tallow to add extra flavor and richness.
How do I make my griddle meals taste like a Hibachi restaurant?
To achieve that authentic Hibachi taste, use fresh garlic, soy sauce, and high-quality oils like sesame oil and Wagyu beef tallow. Adding Lane’s Pow Pow sauce at the end gives your meats and veggies the signature sweet and savory flavor you love from Hibachi grills. Timing is key—make sure you don’t rush the cooking process to get those perfect flavors!
Can I use frozen shrimp for Hibachi cooking?
While fresh shrimp is ideal for Hibachi cooking, frozen shrimp can work in a pinch. Just make sure they’re thoroughly thawed and patted dry before cooking to avoid excess moisture on the griddle. Fresh shrimp will give you a better texture, so opt for those when possible!
How long should I cook shrimp on the griddle?
Shrimp cook quickly on the griddle! Simply toss them in a bit of butter and garlic, and let them cook for 2–3 minutes per side. Once they turn a reddish-pink and curl up, they’re done. Overcooking shrimp can make them rubbery, so keep an eye on them and remove them as soon as they’re cooked through.
What’s the best seasoning for Hibachi-style chicken?
For Hibachi-style chicken, Lane’s Q-Nami seasoning is a must! It’s the perfect balance of savory and slightly sweet, adding a fantastic depth of flavor. You can also add a little soy sauce, sesame oil, and Lane's Pow Pow Sauce during the cooking process for even more flavor.
Can I cook Hibachi at home without a griddle?
Yes! While a griddle gives you that classic Hibachi cookout experience, you can make Hibachi-style meals at home using a cast-iron skillet or flat-top grill. The key is using high heat, fresh ingredients, and plenty of seasoning to get that delicious Hibachi taste.
What’s the difference between Hibachi and Teppanyaki?
Hibachi and Teppanyaki are often used interchangeably, but the key difference is in the cooking surface. Hibachi refers to cooking over a small, open flame, typically using a charcoal grill. Teppanyaki, on the other hand, refers to cooking on a flat, iron griddle or grill, as we’ve done here. Both are delicious, but Teppanyaki is more closely associated with the cooking method used in many Hibachi restaurants.
How do I get my rice crispy on the griddle?
To get crispy rice on the griddle, it’s all about using day-old rice and spreading it out in a thin layer. Let it sit on the griddle for a few minutes without stirring. Then, mix it occasionally to ensure it gets crispy on all sides. The key is to give it time to fry up without stirring too much.

Leave a comment
All comments are moderated before being published.
This site is protected by hCaptcha and the hCaptcha Privacy Policy and Terms of Service apply.