







Updated July 30, 2026
Homemade stock and broth are two of the best ways to turn kitchen odds and ends into the beginning of something great. Bones from last night’s chicken, a few carrots, half an onion, herbs that are approaching retirement, and some patient simmering can become the base for soups, stews, sauces, gravy, rice, and a whole lot more.
The original Lane’s guide covered vegetable stock, meat-based stock, smoked ingredients, pressure cooking, and freezing. We are keeping all of that good stuff while making the process easier to follow, clarifying the difference between stock and broth, and adding the cooling and storage details that keep your hard-earned pot of flavor safe.
What You’ll Need
What Is the Difference Between Stock and Broth?
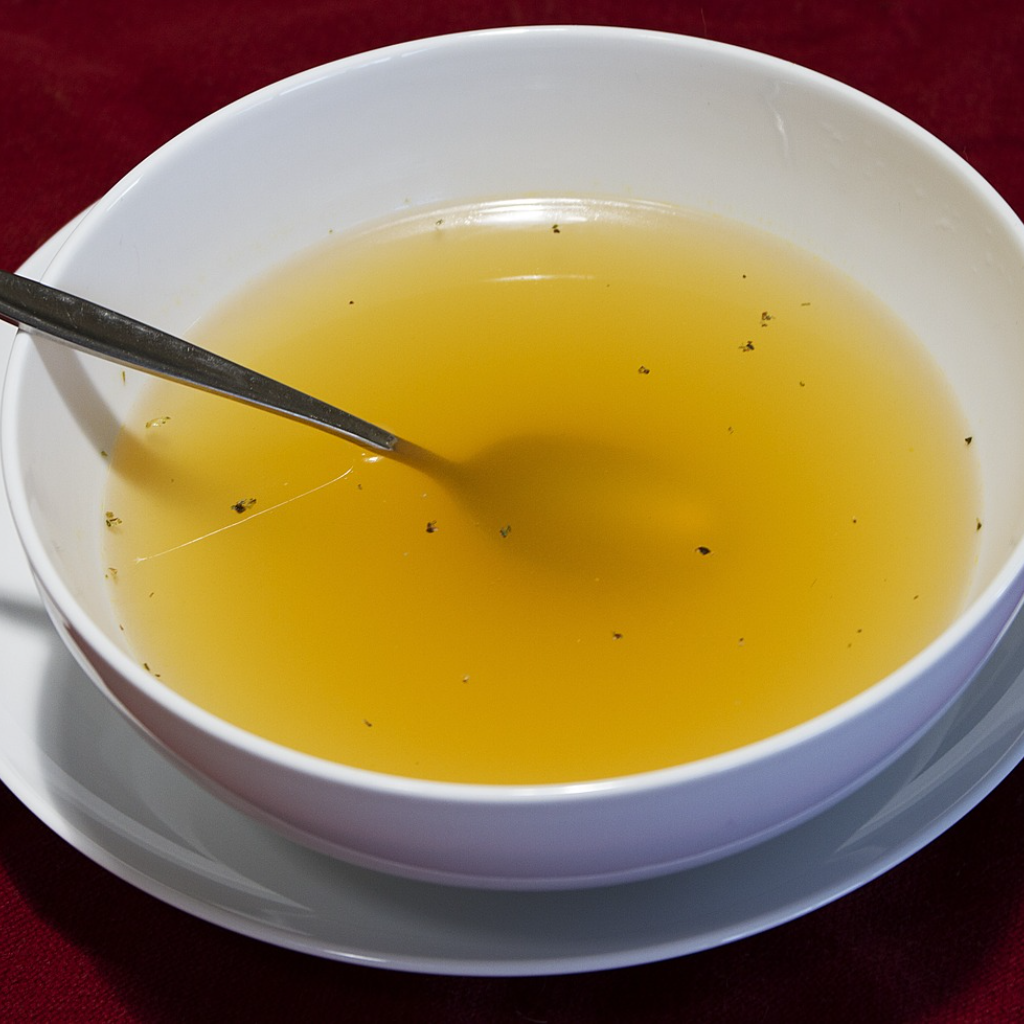
Stock and broth are flavorful liquids used as the foundation for soups, stews, sauces, gravy, risotto, rice, braises, and more. The terms are often used interchangeably in home kitchens, but there is a useful traditional distinction.
Stock
Stock usually relies on bones, vegetables, and aromatics. A longer simmer extracts gelatin from connective tissue, which gives the chilled liquid body and helps create rich sauces and gravy. Stock is often lightly seasoned so the final dish can control the salt.
Broth
Broth commonly uses meat, vegetables, or both and is usually more fully seasoned. It tends to be lighter in body and can be served on its own as well as used in recipes.
Quick Answer
Stock is generally bone-based, richer in gelatin, and lightly seasoned. Broth is generally meat- or vegetable-based, thinner, and seasoned for serving. Real-world labels are not always consistent, so do not lose sleep if your grandmother’s “broth” gels like stock in the refrigerator.
Why Make Stock or Broth at Home?
- You control the ingredients. Choose the bones, meat, vegetables, herbs, and seasonings that fit your cooking and dietary needs.
- You control the salt. Keep stock lightly seasoned, then adjust the final soup, sauce, or gravy instead of starting with an overly salty base.
- You reduce food waste. Rotisserie chicken bones, smoked pork bones, steak trimmings, shrimp shells, mushroom stems, and vegetable pieces can all get one more useful job.
- You build deeper flavor. Roasting or smoking the ingredients and simmering them gently creates a base with more character than plain water.
- You keep dinner starters ready. Freeze stock in recipe-size containers or cubes so future-you can look much more organized than present-you felt.
Save usable bones and clean vegetable trimmings in labeled freezer bags until you have enough for a batch. Avoid anything spoiled, moldy, or dirty. Stock is a smart use for good leftovers, not a witness protection program for vegetables that have gone bad.
Best Ingredients for Homemade Stock
The Classic Vegetable Base
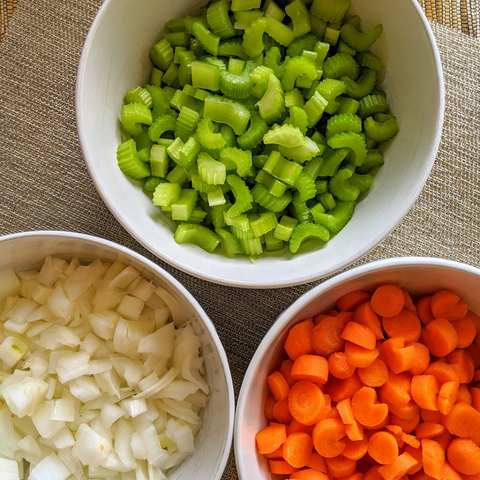
Carrots, celery, and onions form the classic combination known as mirepoix. Garlic, mushrooms, parsley stems, thyme, bay leaves, and whole peppercorns can add more depth.
Bones and Meat
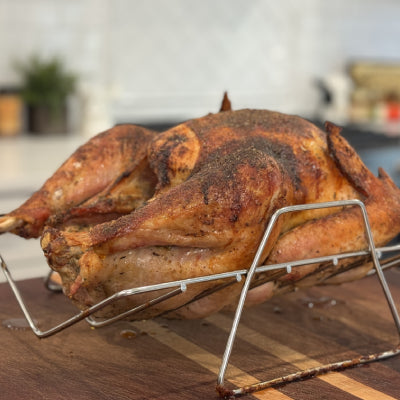
Chicken and turkey carcasses, beef bones, pork bones, lamb bones, fish frames, and shrimp or crab shells can all produce flavorful stock. Bones with a little meat and connective tissue attached provide both flavor and body. Use bones left from smoked meats when you want the finished stock to carry a subtle backyard note.
Herbs and Seasoning
Bay leaves, parsley, thyme, peppercorns, and garlic are easy starting points. The original guide recommends adding 1–2 tablespoons of Lane’s SPG Rub. Begin with less, taste, and remember that reducing stock concentrates both flavor and salt.
Ingredients to Use Carefully
- Cruciferous vegetables: Broccoli, cabbage, cauliflower, Brussels sprouts, and kale can become strong or bitter during a long simmer.
- Starchy vegetables: Large amounts of potatoes can make stock cloudy and thick.
- Beets: Delicious, but they will turn the whole batch into beet stock whether that was the plan or not.
- Salt: Season cautiously if the stock will be reduced or used in another recipe.
How to Make Vegetable Stock
The original Lane’s method starts with carrots, celery, onions, and garlic, then adds mushrooms, parsley, thyme, bay leaves, peppercorns, or other aromatics based on what is available.
- Wash and prepare the vegetables. Cut them into roughly 1-inch pieces. Smaller pieces expose more surface area, but there is no trophy for perfect mirepoix cubes.
- Add everything to a large pot. Use approximately 2 onions, 3 carrots, 3 celery stalks, several garlic cloves, and optional herbs for a basic batch.
- Add cold water. Pour in enough to cover the vegetables by about 1 inch. Too much water produces a weaker stock.
- Bring it just to a boil. Reduce the heat immediately to maintain a gentle simmer.
- Simmer for about 45–60 minutes. The original article allowed 1–2 hours, but most vegetable stock reaches its best balance sooner. A very long simmer can make some vegetables bitter or muddy.
- Taste before seasoning. Add SPG or your preferred seasoning gradually. A splash of vinegar can add tang, but it is optional.
- Strain the stock. Pour it through a fine-mesh strainer. Use cheesecloth if you want a clearer final liquid.
- Cool it quickly. Divide it into shallow containers or set the container in an ice bath, then refrigerate promptly.
How to Make Chicken, Beef, or Pork Stock
- Choose the bones. Use approximately 2–4 pounds of bones for a large stockpot. The original guide suggested 1–2 pounds, which works for a smaller batch.
- Roast or smoke them for deeper flavor. Roast at 425°F for 30–45 minutes until well browned, turning once. Poultry carcasses that are already roasted or smoked can go directly into the pot.
- Add vegetables and aromatics. Onion, carrot, celery, garlic, bay leaves, thyme, parsley stems, and peppercorns make a dependable base.
- Cover with cold water. Add just enough water to cover the ingredients by 1–2 inches.
- Bring to a boil, then reduce immediately. Maintain a bare simmer with occasional small bubbles. A hard rolling boil churns fat and particles into the liquid.
- Skim when needed. Remove foam or excess impurities that gather on the surface during the early stages.
- Simmer gently. Cook chicken or turkey stock for about 2–4 hours. Beef or pork stock commonly needs 4–8 hours. The original guide allowed up to 24 hours, but longer is not automatically better and requires careful heat and water management.
- Add salt cautiously. Season near the end, especially if you plan to reduce the liquid later.
- Strain and cool quickly. Remove the solids, strain through a fine mesh, and use shallow containers or an ice bath to cool safely.
Fish frames and shrimp shells need much less time. Simmer seafood stock gently for roughly 30–45 minutes so it stays fresh-tasting instead of becoming bitter or overly fishy.
Should You Roast or Smoke Bones for Stock?
Skip Browning
Use raw or previously cooked bones without additional browning when you want a lighter-colored, neutral stock for delicate soups and sauces.
Roast the Bones
Roasting bones and vegetables develops browned flavors and creates a darker stock suited for gravy, stew, chili, and pan sauces.
Smoke the Ingredients
Smoke bones or vegetables instead of roasting them when you want the final stock to carry barbecue flavor. Keep the smoke clean and moderate because the stock will concentrate as it simmers.
The original article recommended roasting at more than 400°F for 20–30 minutes. Extending that to approximately 30–45 minutes at 425°F gives larger beef or pork bones more time to develop substantial browning. Pull them when they are deeply browned, not burned.
How to Make Stock in a Pressure Cooker
A stovetop or electric pressure cooker can cut several hours from the process. The original guide noted that stock can be ready in as little as 45 minutes, which is realistic for poultry or vegetable stock once the cooker reaches pressure.
- Add bones, vegetables, herbs, and cold water without exceeding the cooker’s maximum fill line.
- Cook vegetable stock at high pressure for approximately 15–20 minutes.
- Cook chicken or turkey stock at high pressure for approximately 45–60 minutes.
- Cook beef or pork stock at high pressure for approximately 90–120 minutes.
- Allow a natural pressure release according to the manufacturer’s directions.
- Strain, cool quickly, and store using the same process as stovetop stock.
Pressure cookers vary, so follow the instructions for your exact model. “I watched a guy do it online” is not a substitute for the lid-locking and fill-limit section of the manual.
How to Strain Stock and Keep It Clear
- Maintain a gentle simmer. A hard boil breaks ingredients apart and emulsifies fat into the liquid.
- Avoid constant stirring. Let the ingredients simmer without turning the pot into a washing machine.
- Skim the surface. Remove foam during the early cook and excess fat when needed.
- Strain without pressing. Pour through a fine-mesh sieve and allow the liquid to drain naturally. Pressing cooked vegetables forces fine particles through.
- Use cheesecloth for extra clarity. The original guide correctly recommends this inexpensive second filtering step.
- Chill before removing fat. Refrigerated fat rises and firms on the surface, making it easy to lift away.
A cloudy stock is not ruined. It may not win a beauty contest, but it will still make a very respectable pot of soup.
How to Cool, Store, and Freeze Homemade Stock
Cool It Safely
Do not leave a large stockpot on the counter to cool slowly. Strain the stock, divide it among shallow containers, or place the container in an ice-water bath and stir occasionally. Refrigerate or freeze it within 2 hours of cooking.
Refrigerator Storage
Keep stock or broth in covered containers at 40°F or below and use it within 3–4 days.
Freezer Storage
Freeze stock in containers with room for expansion, freezer bags laid flat, or ice-cube trays. Once the cubes are solid, transfer them to a labeled freezer bag. FoodSafety.gov lists 2–3 months as the best-quality window for frozen soups and stews. The original guide suggested up to 6 months for stock cubes; they may remain safe while continuously frozen at 0°F, but flavor quality is best when used sooner.
Reheating
Bring sauces, soups, gravies, stock, and broth to a rolling boil when reheating. Only reheat the amount you plan to use.
Do Not Water-Bath Can Stock
Meat and vegetable stocks are low-acid foods. Shelf-stable home canning requires a tested pressure-canning recipe, the correct equipment, and adjustments for jar size and elevation. Freezing is the easiest option for most home cooks.
Ways to Use Homemade Stock and Broth
Soups & Stews
Use it as the liquid foundation for chicken soup, vegetable soup, chili, beef stew, gumbo, and beans.
Sauces & Gravy
Reduce stock for pan sauces or use it to build gravy with more character than water can provide.
Rice & Grains
Replace some or all of the cooking water for rice, risotto, quinoa, couscous, or grits.
Braises
Add stock to pot roast, short ribs, pork, chicken, or vegetables that need a flavorful slow cook.
Mashed Potatoes
Use warm stock to loosen mashed potatoes or add savory flavor without relying only on dairy.
Quick Flavor Cubes
Drop a frozen cube into vegetables, beans, sauces, or leftovers that need a small boost of moisture and flavor.
Common Stock and Broth Problems
The Stock Tastes Weak
Too much water is usually the culprit. Simmer the strained stock uncovered to reduce it, then adjust the seasoning.
The Stock Tastes Bitter
Vegetables may have cooked too long, ingredients may have burned during roasting, or strong greens and cruciferous vegetables took over the pot.
The Stock Is Cloudy
It probably boiled too hard, was stirred frequently, or had solids pressed through the strainer. It is still usable unless it shows signs of spoilage.
The Stock Is Too Salty
Dilute it with unsalted stock or water. Next time, season lightly and wait until the final recipe to make the last salt adjustment.
The Chilled Stock Turned to Gel
Celebrate. Gelatin extracted from the bones and connective tissue caused the stock to set. It will become liquid again when heated.
The Fat Formed a Solid Cap
This is normal. Lift off as much as you want after the stock chills. Save clean rendered fat separately if you have a planned use for it.
Frequently Asked Questions About Stock and Broth
What is the difference between stock and broth?
Stock is traditionally made with bones, has more gelatin and body, and is lightly seasoned for use in other recipes. Broth is commonly made with meat, vegetables, or both and is seasoned enough to serve on its own.
How long should vegetable stock simmer?
Simmer vegetable stock gently for approximately 45–60 minutes. Longer cooking can make some vegetables bitter or produce a muddy flavor.
How long should meat stock simmer?
Simmer chicken or turkey stock for about 2–4 hours and beef or pork stock for about 4–8 hours. Seafood stock usually needs only 30–45 minutes.
Should I roast bones before making stock?
Roasting is optional. Roast bones when you want a darker stock with deep browned flavor. Skip roasting when you want a lighter, more neutral stock for delicate dishes.
Can I use smoked bones to make stock?
Yes. Bones from smoked chicken, turkey, pork, or beef can make flavorful stock. Use them with a light hand because the smoke flavor becomes more concentrated as the liquid simmers.
Why did my homemade stock turn to gel?
Stock gels when gelatin extracted from bones and connective tissue sets as the liquid chills. This is normal and gives sauces, soups, and gravy more body. The stock will liquefy when reheated.
How long does homemade stock last in the refrigerator?
Store homemade stock or broth in covered containers at 40°F or below and use it within 3–4 days.
Can you freeze homemade stock?
Yes. Freeze stock in recipe-size containers, flat freezer bags, or ice-cube trays. Leave expansion space in rigid containers and label each package with the type and date.
Can homemade stock be canned in a water-bath canner?
No. Meat and vegetable stocks are low-acid foods and require a tested pressure-canning process for shelf-stable storage. Freezing is the simplest storage method for most home cooks.
Save the Scraps, Build the Next Meal
Making stock or broth is less about following one rigid recipe and more about understanding a dependable process. Start with good bones, vegetables, or both. Cover them with cold water, simmer gently, strain carefully, season with restraint, and cool the finished liquid quickly.
Freeze a few portions, and the next soup, stew, gravy, or weeknight pot of rice already has a head start. That is a pretty impressive second act for a chicken carcass and a couple of tired carrots. Live Life Seasoned!


Leave a comment
All comments are moderated before being published.
This site is protected by hCaptcha and the hCaptcha Privacy Policy and Terms of Service apply.